Easy dessert recipes to satiate your sweet tooth
BY DANFE |

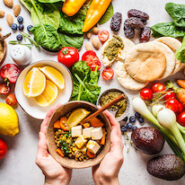
Satiating the sweet tooth can become quite a hard task when you’re your own connoisseur! You’re spending a monotonous day and an unidentified urge hits you right in the middle of the day- You need to eat something sweet, it says. That’s when you know that you need to satiate your sweet tooth! However, with cravings comes another dilemma. To give in to the sweet temptation or to hold back for the sake of health? Well, the good news is that by the end of this very article, you shall find a couple of easy dessert recipes that are healthy and worth relishing! So we shall put you in a win-win situation. We have a collated list of a few deliciously mouth-watering dessert recipes that will be worth the effort you make in the kitchen!
Before we delve into the various types of desserts that could soothe your soul, here’s a slice of information coming right up from the Wiki sources for you- ‘Dessert’ comes from desservir, the French phrase. It essentially translates to ‘to clean the table’. It is indeed fascinating to note that the phrase dates back to the 14th century! Looks like we have come a long way in the journey of sweetness. This piece of writing shall walk you through healthy and simple dessert recipes that will not only cater to your good health but also win your heart by satiating your sweet tooth!
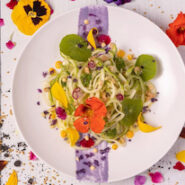
1. Strawberry cheesecake popsicles

The best Summer dessert is right here- this tastes just like a strawberry cheesecake, better yet- on an ice cream stick! Cashews, agave, lemon juice, and apple cider vinegar make up the cheesecake part of the vegan strawberry cheesecake popsicles. The strawberry layer comes next. You can also try raspberries, blueberries, cherries, or peaches if you do not have a taste for strawberries. It is absolutely optional and up to your taste.
Ingredients:
- 1 cup raw cashews, softened if needed (refer to step 1)
- ½ cup water
- 3 tablespoons agave or maple syrup
- 1 tablespoon lemon juice
- 1 tablespoon apple cider vinegar
- Half a teaspoon of vanilla extract
- 1 cup fresh or frozen strawberries (thawed if frozen)
- 3-4 tablespoons vegan cookie crumbs or granola
The combination of these ingredients is a delicious treat devoid of added sweets and artificial additives! The first step of this recipe is:
1. Softening the cashews (an optional step): Softening the cashews before using them can help them blend better. You can skip this step if you have a high-powered blender, but if you don’t, it’s necessary for a smooth and creamy cheesecake layer. To soften the cashews, place them in a small pot with enough water to cover them and simmer for about 10 minutes, or until they are extremely tender. Before using cashews, drain and rinse them.
2. Making the vegan cheesecake layer: In a blender, combine the softened cashews, ½ cup water, agave, lemon juice, vinegar, and vanilla. Blend until the mixture is smooth and creamy. Set aside the cheesecake mixture in a large measuring cup or another container.
3. To make the strawberry layer: Add the strawberries to the blender and blend until smooth. Add 1 – 2 tablespoons of water if needed to blend smoothly to arrive at a nice and soft texture.
4. Assembling the popsicles: Sprinkle roughly 2 teaspoons of cookie crumbs into the bottom of each popsicle well to build the popsicles. Pour or spoon a tiny portion of the cheesecake mixture over the top. Then pour a small bit of strawberry sauce on top. Layer the cookie crumbs, cheesecake layer, then strawberry layer over and over again, until the popsicle molds are all filled. Insert the popsicle sticks (optional, as per your choice) and freeze until solid (about 3-4 hours. Overnight freezing is suggested).
And there you go, your Vegan strawberry cheesecake popsicles are ready! Enjoy while it’s frozen and soothe your cravings.
2. Strawberry cheesecake

Who doesn’t like something in red? Red velvet waffles with your favorite fillings and toppings can actually make your day. Not only are waffles easier to mix up, but they’re also even better than basic cakes and pastries that we happen to fancy. Made from pantry staple ingredients, red velvet waffles are flexible! You can eat them for breakfast, add some sweetness and toppings to them and savor your dessert.
This recipe shall walk you through how to make red velvet waffles at home, in less than 15 minutes!
Ingredients:
- 2 cups Maida flour
- ¼ cup natural process cocoa powder
- ⅓ cup sugar
- 2 teaspoons baking powder
- 1 teaspoon baking soda
- Half a teaspoon of salt
- 2 cups buttermilk
- 5 large egg yolks
- ⅔ cup unsalted butter melted
- Half a teaspoon of red food coloring
- 3 large egg whites
Instructions:
1. Preheat the waffle iron: The first step is to preheat the waffle iron and then begin with the batter preparations. This fastens the cooking time further.
2. Whisk the ingredients together: Whisk together flour, cocoa, sugar, baking powder, baking soda, and salt in a large mixing basin. Mix the buttermilk, egg yolks, and melted butter in a mixing bowl.
3. Mix well: Make sure that you mix all of it thoroughly so that the batter has no lumps.
4. Red food coloring: Add the red food coloring to the mixture and continue mixing it well.
Note: While beating the eggs, make sure that the egg whites should be beaten to medium peaks.
5. Fold gently into the batter: Add the egg whites into the batter, make sure you fold it gently.
6. Cooking the batter: Spray a waffle iron that has been preheated with cooking spray. Now, using a spoon or a ladle (preferable), pour the batter into the waffle iron and make sure that you don’t overfill the cooking iron with the batter. Follow the manufacturer’s instructions owing to the cooking time.
7. Topping and filling: While you can enjoy the waffles as it is, why would you want to skip the chance of making them more delicious? Spread white chocolate on the base of the waffle before folding them. Once you fold, pour some white chocolate and sprinkle your favorite nuts to cherish the heavenly taste of it. You can also sprinkle some powdered white sugar on top of it.
Voila! The best dessert recipe is complete.
3. Rasmalai Trifle
Time for some Indian desserts; when sweet cravings hit you, Indian sweetness has its own way of satiating the sweet tooth! This Rasmalai Trifle is absolute paradise! With layers of mouth-melting cream, pistachio richness, creamy milk with a subtle texture from the laddu and rasmalai bit, and lastly the soft and spongy rasmalai cake. It’s heavenly! Let’s jump right into the recipe.

Ingredients:
- 150 gms Cake Slices (of your choice)
- 250 gms Rasmalai
- 3 Motichoor Ladoo (optional)
- 3 tbsp Rice flour
- 1/4 cup Assorted Nut Flour
- 1 tsp Cardamom Powder
- Half a cup of Sugar
- 1.5 cup Milk
- 1/2 cup Cream
- 1/4 tsp Rasmalai Essence or saffron strands (as per choice and availability)
- Few drops of Yellow Food Color (optional)
- 175 gms Whipping Cream
- 1/4 cup Icing Sugar
Instructions:
1. Prepare Rasmalai pudding: Combine the cornflour, pistachio powder, cardamom powder, and sugar in a saucepan. To combine the ingredients and avoid any lumps, whisk them together. Then slowly pour in the milk and cream, stirring constantly. Add Rasmalai essence or saffron strands (to the milk). Place this over some heat and continue to whisk until the mixture thickens. If you want a color contrast, you can add yellow food coloring at this point (optional). Stir the pudding till it thickens.
2. Rasmalai whipped cream: Whip the cream, icing sugar, and rasmalai essence together in a mixing bowl until completely whipped. You can also use whipped cream bought from the store. Fill a piping bag with the 1M Piping nozzle.
3. The assembling: Begin by layering the cake, then a tbsp of Rasmalai Milk. Place a slice of rasmalai on top and crush the ladoo in your fingers and sprinkle it to fill in the spaces. More rasmalai milk should be poured on top until it reaches the rasmalai layer you just placed. Add a couple of tablespoons of Rasmalai pudding that we earlier cooked. Further, add a swirl of Rasmalai whipped Cream towards the end. Serve chilled, garnished with rose petals, pistachio slivers, ladoo crumbs, or toppings of your choice!
Voila! Here we have our very own Rasmalai trifle. You can play around with the assembling as per your choice. The recipe gives you the luxury to do so. Enjoy chilled.
Desserts are like rain at the end of the desert! No wonder it’s the best part of the entire meal. Now that you have a grip on these many healthy dessert recipes, make sure that you try your hands on all of them and savor the sweetness that life has to offer!
________________________________________________________________________